PHASE 1.4 - Nose ConePurpose: The nose cone is to be put at the top of the rocket. This is a crucial part of our rocket. Group Members: Isabel and Sammie ____________________________________________________________________________________________________ Beforehand Research: We used the suggested website the Andrew suggested to us. It was this, http://www.rocketryforum.com/showthread.php?27098-Balsa-Nose-Cones It had a lot of useful tutorials, and it showed us how to make our nose cone. We decided that our nose cone would be made out of balsa wood. RESEARCH BELOW (Materials and Direction) VVVVVVVV
Materials:
Directions:
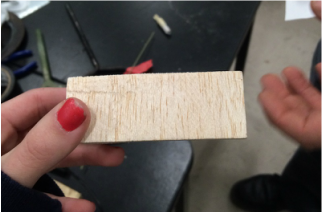
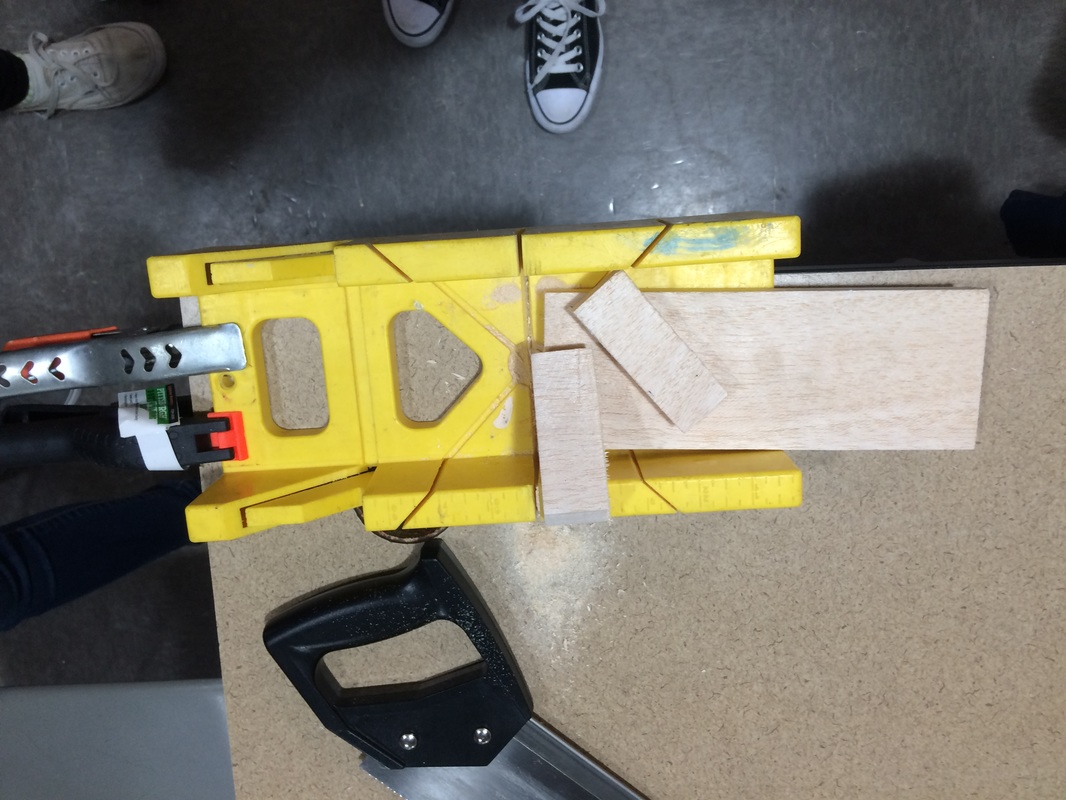
What Happened? - A nose cone story The circumference of our rocket body was 1 3/4" inches. We looked through the box of unfinished balsa wood pieces and found none that met our desired circumference size. Many of the pieces were too small or thin for our rocket. Instead, we grabbed a thick but long piece of balsa wood. It was very similar to a wood plank, but drastically thicker. Andrew suggested that we should cut the wood plank down to two smaller pieces, to later layer on top of each other for our nose cone. We first needed to cut them down. So we grabbed a saw and went to get a yellow holder that holds onto the wood as we saw. We clamped the yellow holder to a table and put our giant wood chunk in there. Using the lines on the holder, we cut straight into the wood, cutting around 2 inches in width of the rectangular chunks. We then proceeded to cut another chunk, matching it up with the other 2 inch chunk. It was very difficult cutting and we had to move cutting outside. We were all afraid of using the saw since we've never used it before, but Sammie got the courage to be able to try it. With some help from Andrew, we were able to successfully cut two chunks of our nose cone.
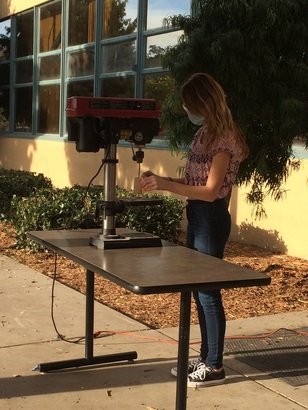
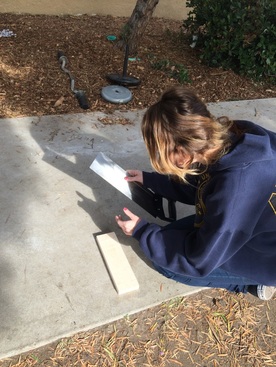
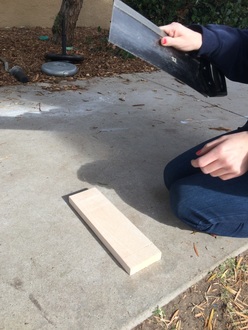
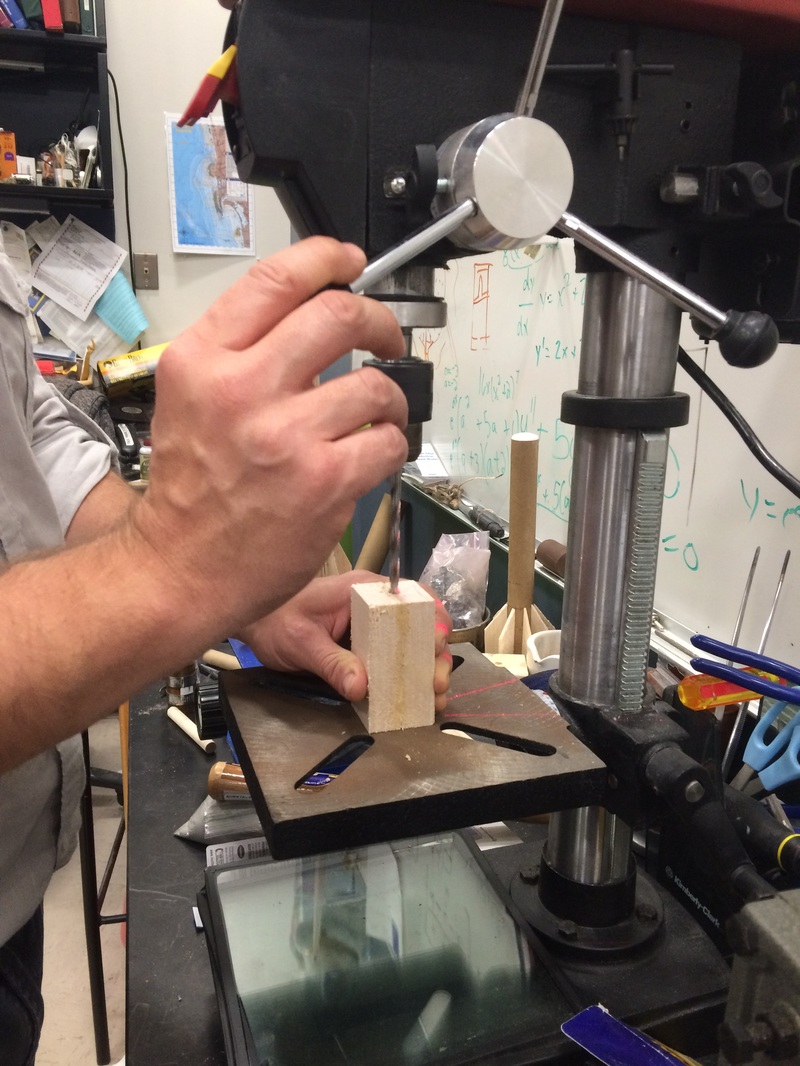
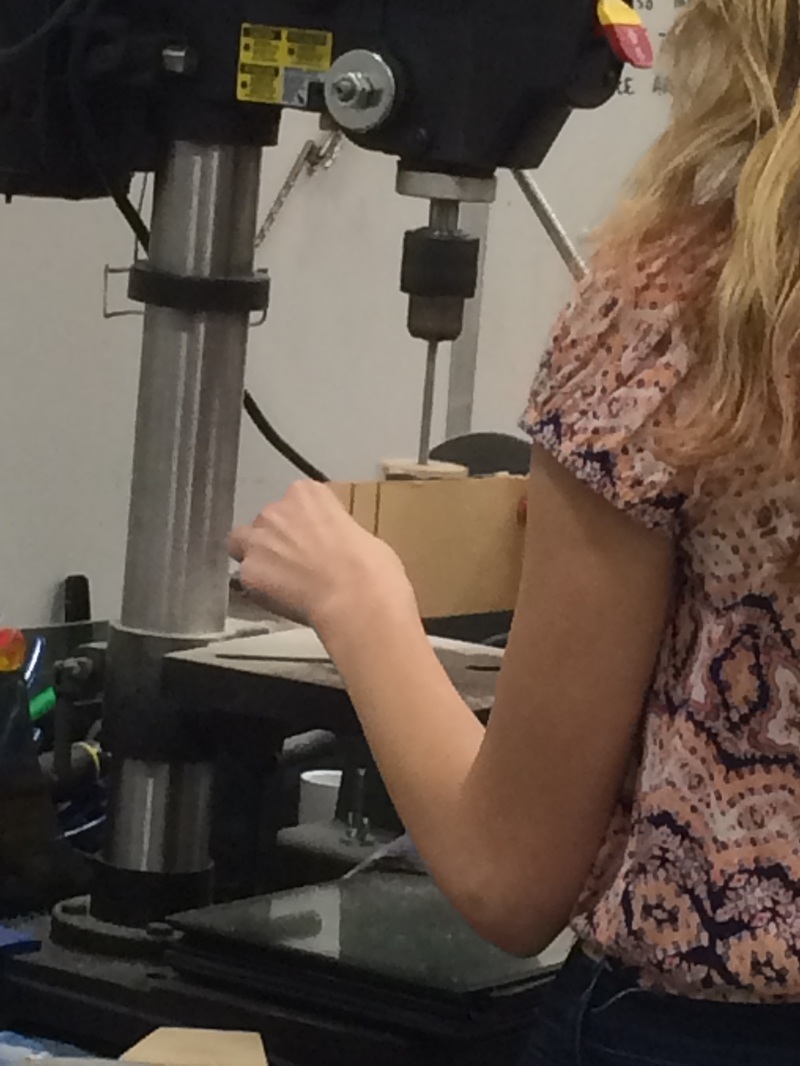
After cutting the wood down, we proceeded into gluing. We got wood glue and we glued the two chunks together. It was much bigger than our circumference now, but we knew that we just had to shave it down into a cylinder that will fit. We clamped the two pieces together as it glued and waited for 15 min. We then had it dried and proceeded into drilling a dowel into our chunk. Andrew helped us with this, he put a small wooden dowel into our wood chunk and glued it in firmly. MOST DIFFICULT PART: Lugging a huge drill press outside and setting up a long extension cord to lead outdoors and lugging tables back and forth. (I felt strong after doing all of this for two days) We had to borrow a table from a teacher close to the outside door to the fishbowl and we also had to carry the drill press all the way outside onto that table. Isabel brought the extension cord, Sammie and I found the table, and the three of us all together carried the extremely heavy drill press outside. With assistance, we got the nose cone spinning on the drill press. _SAFETY REQUIREMENT_ Whenever we were sanding the nose cone, we were required to wear a safety mask as well as safety glasses. The wood chippings and shavings came off really quickly and can sometimes be harmful if it gets in our eyes, or if inhaled. So we then slowly sanded our rectangular chunk into a cylinder. It became rounded very quickly, but making it into an even circle was difficult. Andrew suggested to use a pencil to draw a end line for how much we sand down. It was visible when the nose cone was spinning. We got our cylinder finished to wear it fit pretty snug into our rocket body, and so we continued and began creating a sort of curve and point to the top edge of it. We used a sand paper that was stapled onto a chunk of wood, this made it sturdier and made the force the sandpaper was putting on the chunks greater. It was good for creating a curve on the top area of it. We decided not to have such a pointy nose cone, and so we just left a roundish edge to the top of ours. It fit into our rocket body well and we were finished. We used leftover sand paper to fix any edges.
 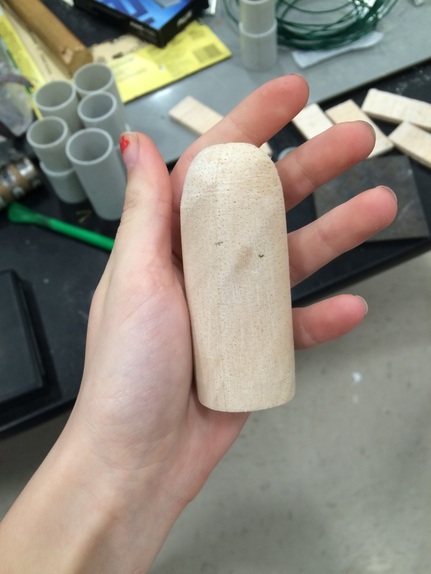 NEXT STEP: Attaching payload and PVC plug to the Nose cone We wanted a payload area on our rocket, between the body and the nose cone. Andrew supplied us with a plastic cylinder that we later cut and sanded down. It would be the payload in between the body/nose cone. Andrew also supplied us with pvc plugs that he found from the other class, we used that to connect our rocket body to the payload area. Our plan was to put a small camera inside our rocket while it's launched to have a different pov of what's happening when a rocket is launched.  FINAL THOUGHTS: Nose Cone Height - 4 inches Nose Cone + Payload Height - 7 inches Diameter Nose Cone - 1 1/2 inches I am really glad that we did this method of creating nose cones. I was able to learn a lot and was able to try more things this way. It was cool having just my group and I doing a lot of manual work that people said we would have a hard time doing. We were able to use the drill press, use saws, carry REALLY heavy things, etc. I was glad to be able to try these things. Our nose cone itself turned out great, I thought that we did a good job and that it was very different from everyone elses standard nose cone. I am excited to see how our rocket will work, I am hoping that we can really make use of the payload area of our rocket.
0 Comments
Leave a Reply. |
AuthorWrite something about yourself. No need to be fancy, just an overview. Archives
December 2015
Categories |
 RSS Feed
