|
My favorite part of this chemistry semester was probably the rocket project itself. With some of my other projects, some of the things didn't work. Such as the lava lamp that eventually got thrown away. I was interested in a lot of the other projects as well, but for me, the rocket was the biggest success and is something I am proud of. It is the thing I will be showing to my family and people outside of school, to show what we do in school. It's an experience I will never forget and is something out of the ordinary for a 15 year old girl. The whole process was difficult but the best part itself was seeing the rocket launch. It's seeing the thing you put so much into for so many weeks finally fly right before your eyes. I was happy to see that and just the experience itself was very fun.
I liked having the 250 goal to reach. I think that helped push me to work harder in getting up to the points. I found that I improved on work ethic on this class. The standards Andrew had were very high to reach, especially with the blogs. And I feel that I poured so much effort into this blog and into the class in general. It wasn't even just about the points in general, I feel that along the way I had a lot of fun. I really enjoyed the freedom this class had, for we were able to do things that we wanted to do, not just what the teachers decided. It was a nice change since the Humanities/Math project was sports and not many were interested in that. So chemistry was a great place to just have the freedom to do what we were interested in. I really satisfied my curiosities here, I was able to learn more about things I've always wondered about, the periodic table, how rockets work, etc. And I really enjoyed the parts of the tests, projects, and experiments where my question "How does that work?" is always answered. I had many questions answered this semester, and I will look back on my time with Andrew and the class in general as a time I worked hard, a time I learned so much about myself and about the world, a time I got closer to classmates and friends, and a time where I had many questions answered. If I had advice for students, I would say to keep on pushing yourself to ask questions. There will never be a point where one is left unanswered. There is always teachers like Andrew/Braden as well as websites and fellow people around you that will answer questions. Also don't think about this class as merely "point" based. Don't just come into class everyday thinking I NEED 250 points! Just have fun. Be curious, ask things, write down everything, document, take pictures, and get closer to people around you. You will never have chemistry again in High Tech High sadly, so take advantage of all the cool opportunities this class gives you. Message to Andrew: I want to thank you for all that you have done for our class. I am sorry for all the times that we were very hard to work with, but thank you for persevering and for still working hard to push us. You have taught me so much and I am extremely thankful to have been in your class. Your class is something I will never forget and I can definitely say that I can take away so much from it. Thank you for all the things I learned and for all the questions of mine that you have answered. Thank you for all the amazing opportunities you gave me. I would have never imagined myself creating a rocket and more. Thank you for all the work you have put into planning this semester and all the projects in it. There were times where we were difficult for you, but thank you for being able to be patient and tolerating our class. Good luck in the future with the next classes, and I hope to possibly work with you again, maybe on another rocket. Because of your class I realized that there are a lot of things in this world that I have yet to experiment on and to discover. I also realized that I am capable of more than I thought I would be. Thank you for this great semester! Have a wonderful Christmas break. Also shoutout to Braden for all the work he has done for the class! Thank you! This is the last post on this Chemistry Blog. I have put hours and hours of work on this thing, and now it is goodbye!
0 Comments
PHASE 3.0 - Rocket Project Reflection
Building a rocket itself is something I didn't imagine myself doing in my life. I am really glad to have been able to do a project like this. I am proud of the work I have done and I would try doing this again if I had a chance to do it. ____________________________________________________________________________________________________
I feel like when you build a rocket you have to know that the outcome of it is unpredictable. Even if we do calculate our thrust curve, even if we do have all parts ready and perfect, even if all the elements seem to be working fine, anything could happen out there on the launch pad. It's impossible to tell how things will work. ____________________________________________________________________________________________________
I found that I worked hard on this project. Whenever there was a problem or if a group member couldn't do a task, I was up to do it for them. I was open to doing different things and I feel that I helped push our group to get work done. ____________________________________________________________________________________________________
I was glad to have been in a group with just girls. I feel like building rockets and so much of the process of it like drilling, sawing, etc, are all things that people would not think of girls being able to push through with. A lot of people asked when we would do things "Do you need help?" but we'd always reply with no we can handle this. And we did! It feels really good to have been able to do harsh physical tasks without help from anyone else. We were able to do a lot of actions that are normally abnormal for a girl to do. ____________________________________________________________________________________________________
My main advice is to always document your work, no matter what. And to blog along the way! That was my problem sometimes in this class, sometimes I wouldn't blog right away. I suggest that everyday or every week or so, that people should blog at least a small summary of what they had done on that day. I think it's hard doing it all at the end, so if you want to remember every detail and story, then blog as you go. ____________________________________________________________________________________________________
I would also say to have a clearer schedule of what is happening. Maybe more due dates. A lot of groups were left behind, and there were some days where people wouldn't know what was even going on. It would be helpful to have a clear date like okay by Friday all rocket bodies should be done, by next Wednesday, you should have nose cone designs finished, etc. That will really push groups to work more efficiently to meet due dates. Rather than slacking until it's the few weeks of the section. PHASE 2.0 - ROCKET LAUNCHPurpose: LAUNCHING OUR ROCKET.. FINALLY! Group Members: Sammie and Isabel! ____________________________________________________________________________________________________ What Happened? - ROCKET LAUNCH STORY Wednesday was when were supposed to launch but instead we had to go on Monday of the next week. All the groups that hadn't gone went with us. We just went with Braden and he drove the two groups to the island. When we got there, it was extremely cold and windy. We let the other group go first. When we got the other group to go, their rocket flied in a sort of curve towards the water. They chased after it and saw that it went into the water. Because of this, Braden suggested that we move more into the island, to prevent our rocket from zooming into the water. We moved and we finally went to launch our rocket! We had a really hard time starting it up at first, the fuze was not lighting. We also had to repair our launch lug for it was very loose on our rocket. Isabel had to go and run to get super glue, sadly she got super glue all over her hands in the process. But finally, we were able to get our rocket to launch. YES!!!!!! IT WORKED!!!!!! I was so happy to see our rocket launch. I was actually surprised at how straight and how far it went. I even lost it in the camera view. I was really proud of the work we did, even the crooked fins we had still worked, as well as the oddly shaped nose cone.
What had happened after the launch was that our rocket zoomed back to the ground. The parachute didn't deploy! It ended up landing nose cone first into the ground, breaking some of our fins in the process. Our rocket wasn't totally ruined, just the fins were crushed in half as well as a dented rocket body. We found that our parachute didn't deploy, for it was stuck crumpled up in our rocket body. (Along with some tape accidentally sticking to it that was supposed to be used to fit in our nose cone to our rocket body well.) Things you Learned? Observed?:
Group Members: Isabel and Sammie were the best group members I could have asked for. They are not only my close friends but are great people to work with. Each of us pushed through with work and we all were able to contribute very equally to the project. All of us knew everything that was going on in our rocket, and not once have I felt like one of us or two were doing more work than the other. I was glad to have been in a group with just girls. I feel like building rockets and so much of the process of it like drilling, sawing, etc, are all things that people would not think of girls being able to push through with. A lot of people asked when we would do things "Do you need help?" but we'd always reply with no we can handle this. And we did! It feels really good to have been able to do harsh physical tasks without help from anyone else. We were able to do a lot of actions that are normally abnormal for a girl to do. Afterthoughts: Even though there were technical difficulties, I was really happy and quite satisfied with how the whole event went. I was afraid of our rocket not working but instead it worked far better than I thought it would. The whole project itself, I just feel really thankful to have been able to have an opportunity to do something like this. Most 15 year old kids can't say "I've built my own working rocket from scratch, with homemade fuel, materials, everything. It went hundreds of feet into the air." This is an experience that I will never forget. I have enjoyed learning about rockets and seeing the whole process it takes to actually build one. Just in general, most people give me a strange look when I tell them that I built a rocket. They say like oh so it was out of a kit from your teacher right? And I respond with no, it was something we built from scratch PHASE 1.7 - TestsPurpose: To see if our rockets are ready for launch. Group Members: Sammie and Isabel ____________________________________________________________________________________________________ Beforehand Research: There was none needed besides learning how to do the tests. Directions:
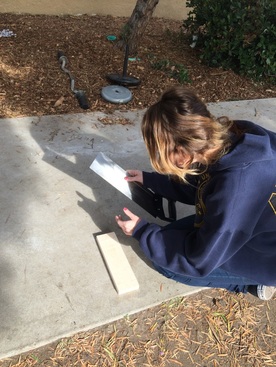
What Happened? - A Test story We finished creating our rocket finally. Now it was time to tie the string onto the rocket. We tied it on and we went outside to test it. Sammie ended up spinning it around, I filmed with Isabel. We added the motor in our rocket beforehand and began the tests. Our tests itself worked fine. We were allowed to launch our rocket. Our rocket stayed straight in the air when we actually spun it around. We didn't get the part where we did it again to see how it goes slowly. OUR ROCKET WAS READY TO LAUNCH YAY!
We signed up for launching on Wednesday of the next week. PHASE 1.6 - CalculationsPurpose: to find the weight of our rocket and surface area to see how much fins we need in order to have a balanced weight of the rocket Group Members: Isabel and Sammie ____________________________________________________________________________________________________ Background Research; There was no real research besides finding out how to calculate Directions:
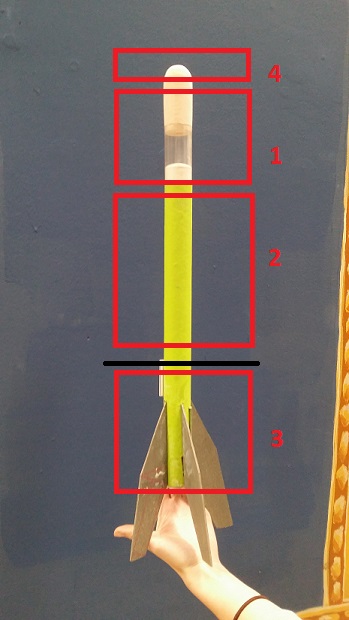 SURFACE AREA = Circumference times Height. ___________________________________________________________________________________________________ What Happened? - A calculation story We first found the midpoint of our rocket. We then had Braden mark it with sharpie. We then calculated the the surface area of 1. AREA 1: 1.25 (diameter) x PI = Circumference 3.925 3.925 x 6 in (height) = 23.55 SURFACE AREA = 23.55 AREA 2: 1.25 (diameter) x PI = Circumference 3.925 3.925 x 8 in (height) = 31.4 SURFACE AREA =31.4 AREA 3: 1.25 (diameter) x PI = Circumference 3.925 3.925 x 5.75 in (height) = 22.568 SURFACE AREA = 22.568 AREA 4: (Must do 1.25 x 1.25 times PI) 1.25 (diameter) to the power of 2, x PI = Circumference 4.908 SURFACE AREA = 4.908 Once we calculated all the surface areas, we added 2 and 3. AREA 2 + AREA 3 + AREA 4 = 22.568 + 31.4 + 4.908 = 58.876 Then we subtracted AREA 1 from all else. 58.876 - 23.55 = 35.326 which means we need a surface area total of 35.326 of our fins added all together somehow to have a balanced weight. 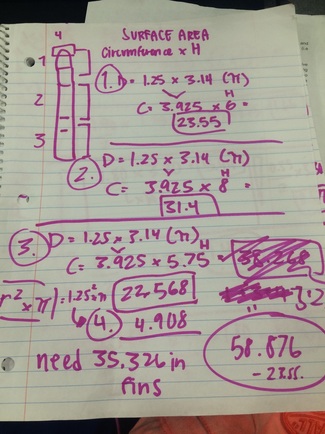 FINS: We had already made our fins. So instead of actually making new ones, we must calculate if our surface area is enough with our current fins. Since our fins are strangely shaped, Braden had to cut them in different sections and we had to make more calculations. 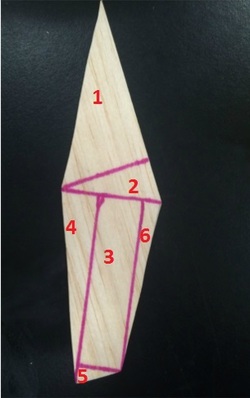 We had four fins so we just had to 1. Find areas of 1-6 2.Add them together 3.Multiply by 4 4.See if they're enough or if we need more SURFACE AREA = B x H /n2 AREA 1: 1.75/2 x 3.25 = 2.84 Surface Area= 2.84 AREA 2: 1.90/2 x 1.75 = 1.66 Surface Area = 1.66 RECTANGLE SURFACE AREA = L times H AREA 3: 1.80/2 X 3.30 = 5.94 Surface Area = 5.94 AREA 4: 0.75/2 x 3.75 = 1.406 Surface Area: 1.406 AREA 5: 0.40/2 x 1.80 = 0.36 Surface Area = 0.36 AREA 6: 0.35/2 x 1.75 = 0.577 Surface Area = 0.577 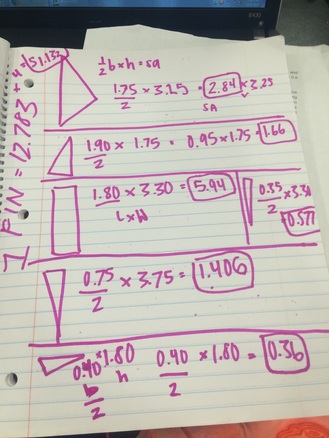 Add up all of these calculations and have the final surface area.
TOTAL SURFACE AREA OF ONE FIN = 12.783 12.783 X 4 FINS = 51.132 SURFACE AREA ____________________________________________________________________________________________________ FINAL THOUGHTS: This means that we have more than enough weight for our fins. We cover the necessary surface area our rocket covers. We don't need to add anymore or less to our rocket. Our fins will stay the same We will just add a few coins to our nose cone to balance out the weight. PHASE 1.5 - Painting/Putting parts togetherPurpose: We have to connect all our separate rocket parts together now since we finished making each one. We have to paint it and we must connect the body to the nose cone/payload. We are not to attach the fins yet for we must calculate weight first to check if it's enough weight to balance the weight of our rocket. Group Members: Isabel and Sammie ____________________________________________________________________________________________________ (No Beforehand Research required for this process) Materials:
Vision: We honestly wanted ours to look different from everyone elses. Instead of painting a typical blue we decided on an off set green. We were going to paint it to be similar to the character "Mike Wazowski" but we didn't end up doing that. ____________________________________________________________________________________________________ What Happened? - A painting/building story After we finished creating the individual parts for our rocket. We began to paint. We borrowed paint from Mike and chose to paint our rocket green (so it would be out of the ordinary). We actually painted our rocket body as we were building the nose cone. We also went on and painted our fins silver (with glitters). We also super glued our nose cone onto the payload. We couldn't glue the payload to the rocket body for we had to have the parachute in there. Connecting Parachute with Launch Lug: Using the old folders that Andrew gave us, we ripped it apart to get the metal file part. We would later bend that into the Launch Lug that kept our motor in place at the edge of our rocket. We then pushed our parachute into the actual rocket body, connecting the string to the nose cone.  PHASE 1.4 - Nose ConePurpose: The nose cone is to be put at the top of the rocket. This is a crucial part of our rocket. Group Members: Isabel and Sammie ____________________________________________________________________________________________________ Beforehand Research: We used the suggested website the Andrew suggested to us. It was this, http://www.rocketryforum.com/showthread.php?27098-Balsa-Nose-Cones It had a lot of useful tutorials, and it showed us how to make our nose cone. We decided that our nose cone would be made out of balsa wood. RESEARCH BELOW (Materials and Direction) VVVVVVVV
Materials:
Directions:
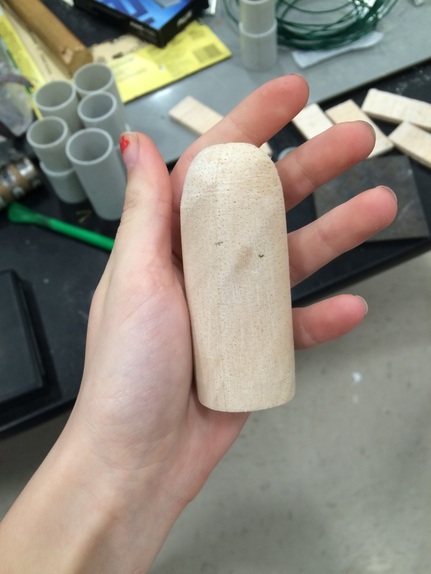
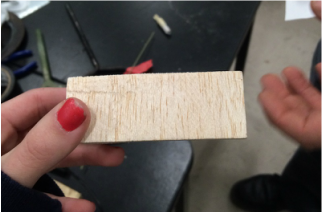
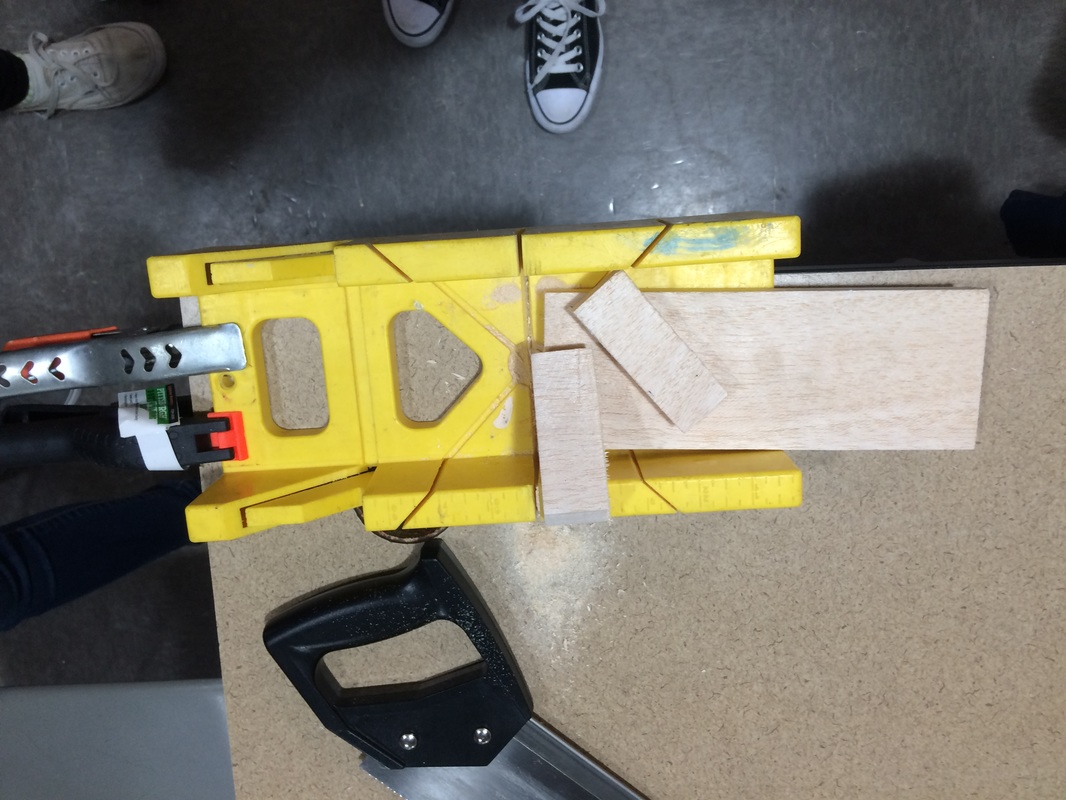
What Happened? - A nose cone story The circumference of our rocket body was 1 3/4" inches. We looked through the box of unfinished balsa wood pieces and found none that met our desired circumference size. Many of the pieces were too small or thin for our rocket. Instead, we grabbed a thick but long piece of balsa wood. It was very similar to a wood plank, but drastically thicker. Andrew suggested that we should cut the wood plank down to two smaller pieces, to later layer on top of each other for our nose cone. We first needed to cut them down. So we grabbed a saw and went to get a yellow holder that holds onto the wood as we saw. We clamped the yellow holder to a table and put our giant wood chunk in there. Using the lines on the holder, we cut straight into the wood, cutting around 2 inches in width of the rectangular chunks. We then proceeded to cut another chunk, matching it up with the other 2 inch chunk. It was very difficult cutting and we had to move cutting outside. We were all afraid of using the saw since we've never used it before, but Sammie got the courage to be able to try it. With some help from Andrew, we were able to successfully cut two chunks of our nose cone.
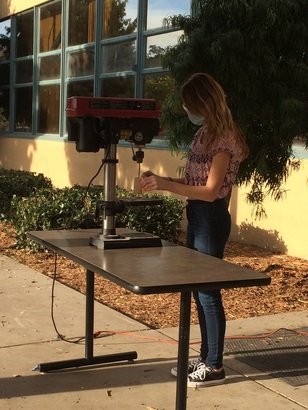
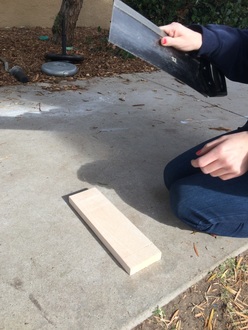
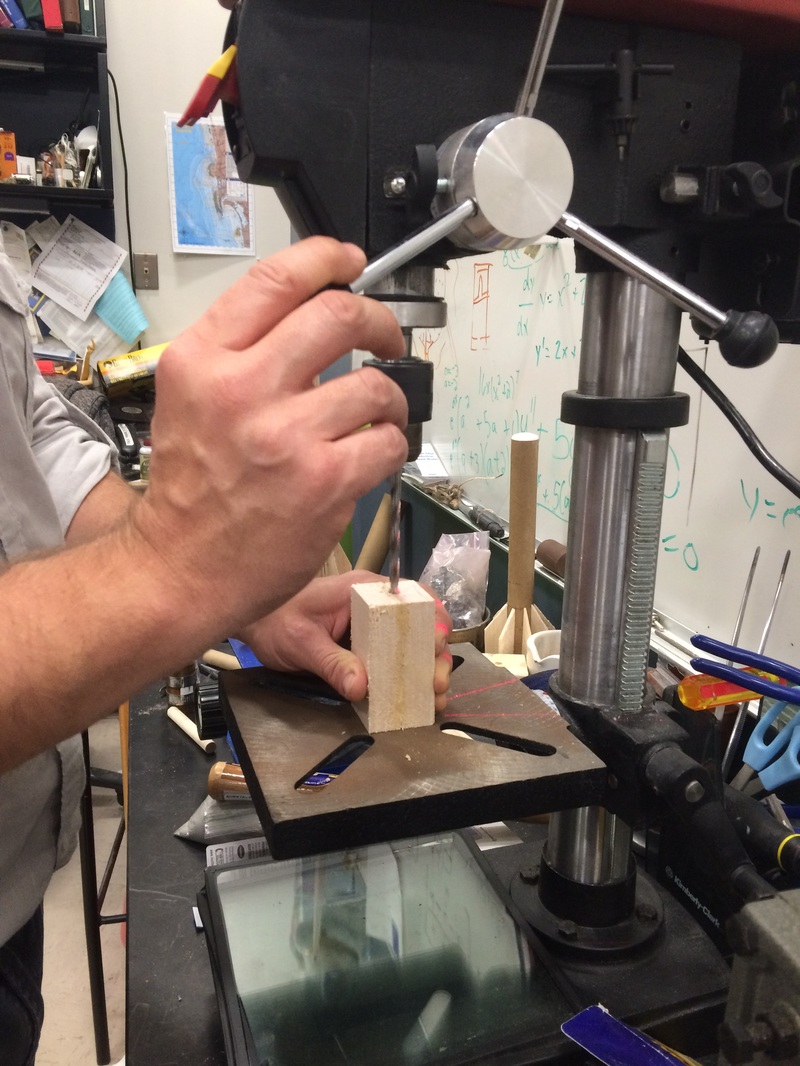
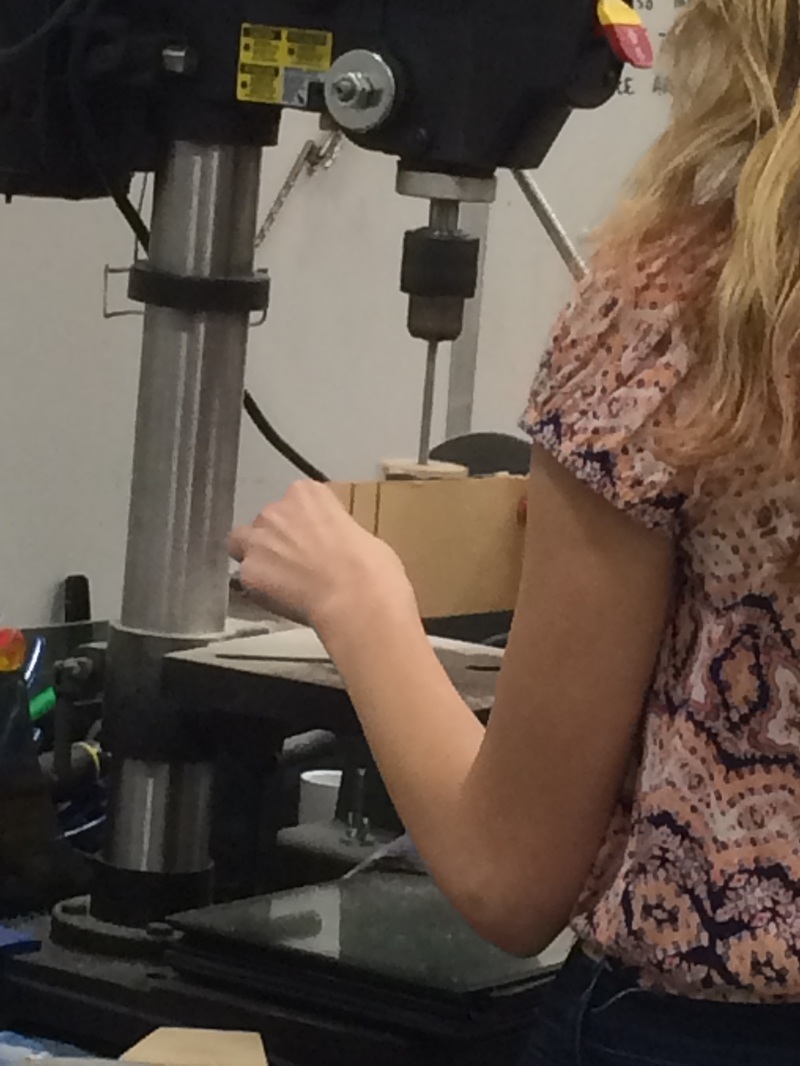
After cutting the wood down, we proceeded into gluing. We got wood glue and we glued the two chunks together. It was much bigger than our circumference now, but we knew that we just had to shave it down into a cylinder that will fit. We clamped the two pieces together as it glued and waited for 15 min. We then had it dried and proceeded into drilling a dowel into our chunk. Andrew helped us with this, he put a small wooden dowel into our wood chunk and glued it in firmly. MOST DIFFICULT PART: Lugging a huge drill press outside and setting up a long extension cord to lead outdoors and lugging tables back and forth. (I felt strong after doing all of this for two days) We had to borrow a table from a teacher close to the outside door to the fishbowl and we also had to carry the drill press all the way outside onto that table. Isabel brought the extension cord, Sammie and I found the table, and the three of us all together carried the extremely heavy drill press outside. With assistance, we got the nose cone spinning on the drill press. _SAFETY REQUIREMENT_ Whenever we were sanding the nose cone, we were required to wear a safety mask as well as safety glasses. The wood chippings and shavings came off really quickly and can sometimes be harmful if it gets in our eyes, or if inhaled. So we then slowly sanded our rectangular chunk into a cylinder. It became rounded very quickly, but making it into an even circle was difficult. Andrew suggested to use a pencil to draw a end line for how much we sand down. It was visible when the nose cone was spinning. We got our cylinder finished to wear it fit pretty snug into our rocket body, and so we continued and began creating a sort of curve and point to the top edge of it. We used a sand paper that was stapled onto a chunk of wood, this made it sturdier and made the force the sandpaper was putting on the chunks greater. It was good for creating a curve on the top area of it. We decided not to have such a pointy nose cone, and so we just left a roundish edge to the top of ours. It fit into our rocket body well and we were finished. We used leftover sand paper to fix any edges.
  NEXT STEP: Attaching payload and PVC plug to the Nose cone We wanted a payload area on our rocket, between the body and the nose cone. Andrew supplied us with a plastic cylinder that we later cut and sanded down. It would be the payload in between the body/nose cone. Andrew also supplied us with pvc plugs that he found from the other class, we used that to connect our rocket body to the payload area. Our plan was to put a small camera inside our rocket while it's launched to have a different pov of what's happening when a rocket is launched. 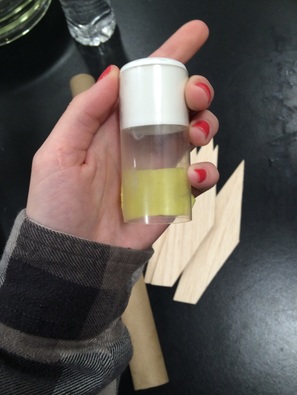 FINAL THOUGHTS: Nose Cone Height - 4 inches Nose Cone + Payload Height - 7 inches Diameter Nose Cone - 1 1/2 inches I am really glad that we did this method of creating nose cones. I was able to learn a lot and was able to try more things this way. It was cool having just my group and I doing a lot of manual work that people said we would have a hard time doing. We were able to use the drill press, use saws, carry REALLY heavy things, etc. I was glad to be able to try these things. Our nose cone itself turned out great, I thought that we did a good job and that it was very different from everyone elses standard nose cone. I am excited to see how our rocket will work, I am hoping that we can really make use of the payload area of our rocket. PHASE 1.3 - Parachute!Purpose: To make a parachute for our scratch rocket. It's going to be homemade this time .The parachute will deploy after the rocket has launched and is ready to fall. It will help to safely bring the rocket back down to us without creating any damage of things or people with harsh impact from the falling rocket. Group Members: Sammie and Isabel! ____________________________________________________________________________________________________ Beforehand Research: http://www.instructables.com/id/DIY-Model-Rocket-Parachute/ Using this website, we just viewed a really simple tutorial of how to make the rocket parachute. It gave us the list of materials and the directions in order to make one. Since this one was fairly easy, we relied on this source to help us. We used a simplified version of what this website gave us, for we lacked time and resources. RESEARCH BELOW vvvvvvv Materials:
Directions:
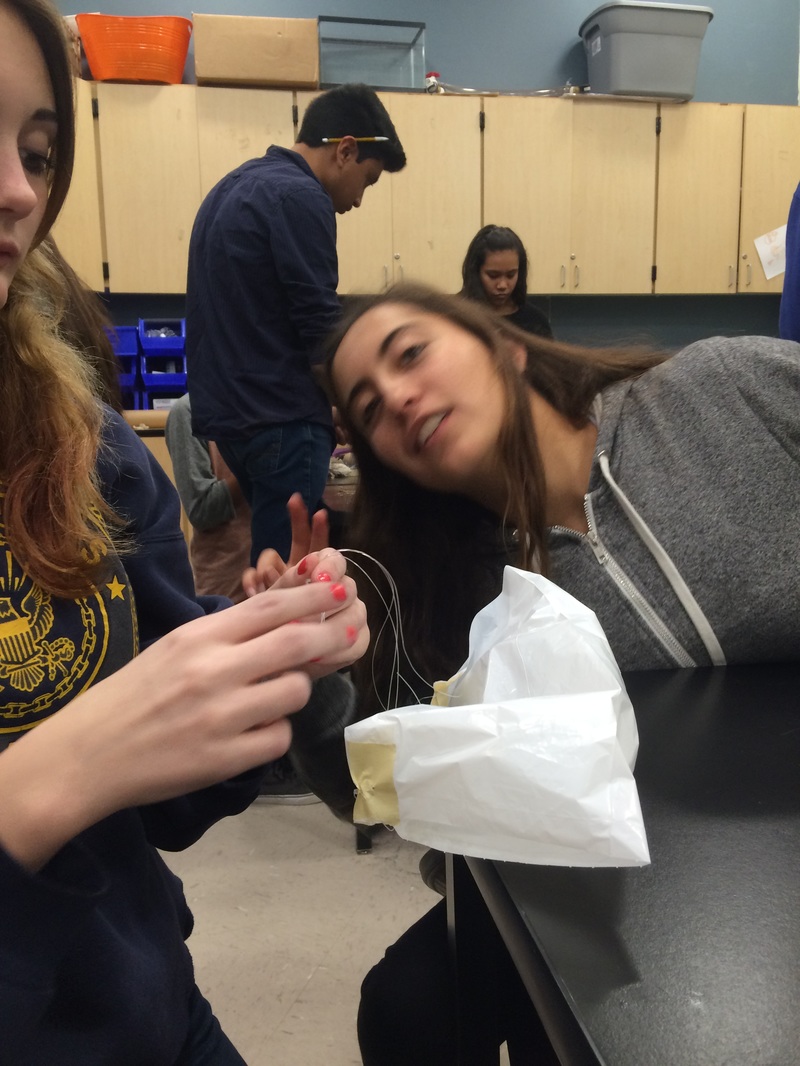
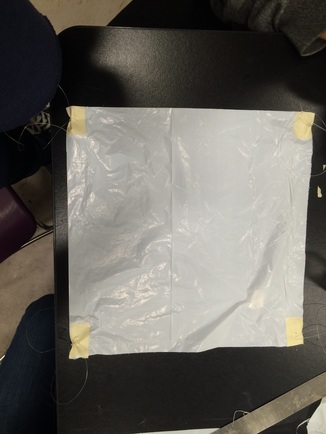
What Happened? - A parachute story Once we figured out a simple way to make it, we began gathering materials. Andrew had spare plastic bag type of resources in the lab, and so we just used those. Sammie got the ruler and measured 12 by 12 on each side, then she used a pen to trace out a perfect square. Isabel cut out the square once it was finished and I began cutting the string. I measured up to 12 inches, I wanted to make sure there wasn't too much or too little. As I cut four strings, we all tied them to the corners with holes. In just 10 minutes we finished our parachute. It was probably the simplest part of making our rocket. Once we finished, my group members waved it around in the air to "check"if it worked. Our parachute overall seemed fine. We saw that other group members made circle shaped ones, but we still went with the 12 by 12 design.
FINAL THOUGHTS:
This part of our rocket was really easy to make. I think that most of the parachutes will work, and hopefully we did ours right. PHASE 1.2 - Fins Purpose: We were to design and build the fins of our rockets. The fins are a very crucial part of the rocket. We had a choice in size, shape, number of fins. etc. Group Members: In this I worked with Sammie and Isabel. ____________________________________________________________________________________________________ Beforehand Thoughts: There were no previous research for this. We were just told to make fins. There wasn't really a certain limit or a certain aspect we needed to keep in mind. We just had to build and design fins that best fit our rocket. For the most part, we did it all on our own. We had freedom of size, shape, number of fins, etc. One of the only requirements we had was to make it out of balsa wood. DESIGN: I was in charge of designing our fins, and I actually designed it after this one rocket that was always showcased in Andrew's room. It was yellow and was called "Big Bertha" (I THINK). I really liked the type of fins that they used, and so I got a ruler and began measuring how long they were and transferred the measurements to a file on Adobe Illustrator. # OF Fins: I honestly thought that 4 fins were enough for our rocket. I knew that the weight for the fins and the whole rocket in general was very crucial, so I thought 4 fins was just enough. Any more would add unnecessary amounts of weight. I decided that 4 fins would be enough, and based on our previous model, the rocket was fine with very simple shaped fins. 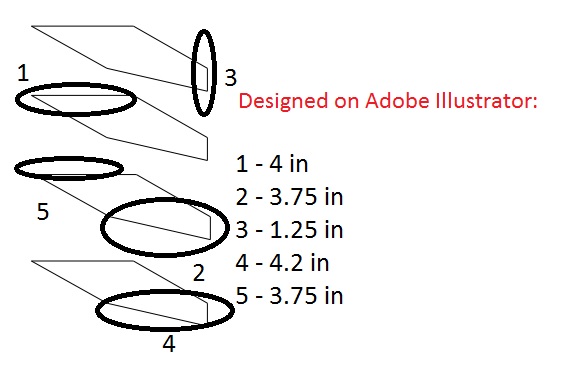 Materials:
Directions:
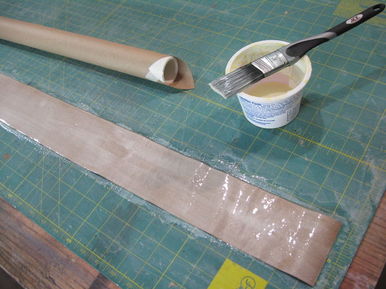
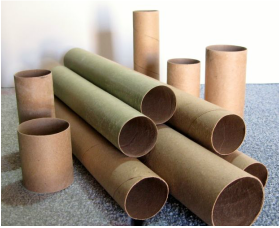
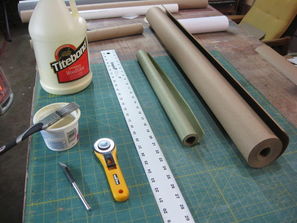
____________________________________________________________________________________________________ What Happened? - A fin story We got our necessary materials and we began designing. Like I said earlier, I wanted to base our design off of "Bertha" the yellow one thing. I really liked how the fins elevated the rocket in height by jutting out below the actual rocket tube. I thought the design was really different and very interesting, and I thought it would be interesting to see how it would work with our scratch made one. I went on Adobe Illustrator and took a whole period to calculate all the measurements of our fins from the model yellow rocket. It took while, but I was able to create a perfect fin that resembled the model very much. I copied four of them onto the document and prined them out. Sammie and Isabel got the balsa and I got our paper. We cut out a fin out of paper, and place it on the balsa wood. We first outlined it with sharpie (JUST IN CASE) before cutting. We then proceeded to cutting, making a very fine fin. The x-acto knife we had was great and I thought that we cut a very quality fin. We then did the rest, cutting four of them out. Since we had a good knife, it was very easy to cut straight and full lines. Most of our fins were perfectly aligned with each other, there were a few areas that were crooked, but no drastic mistakes. We were able to save wood and materials. 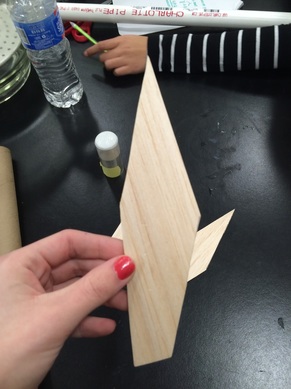 ____________________________________________________________________________________________________ FINAL THOUGHTS: I thought our fin making was a lot more successful than our body making. I was very glad with how well our fins came out. They were almost exactly how I imagined it to be and the whole process wasn't much of a struggle. I think our fins will work well for our project. ROCKET STATUS UPDATE: WE GOT OUR ROCKET BODY AND OUR FINS DONE! WOOOOOO 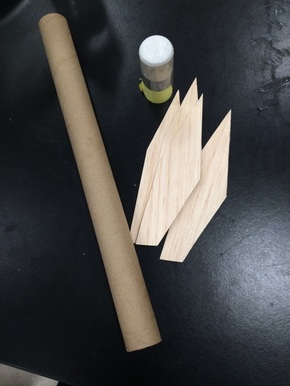 PHASE 1.1 - Rocket BodyPurpose: This portion of the PHASE 1 - Building Process is to build the body of our rocket. The other components of the rocket will be posted as well. Group Members: Sammie and Isabel. We all worked together in order to make our body. ____________________________________________________________________________________________________ Beforehand Research: Andrew as well as this website helped us learn how to make the Rocket Body. The Rocket body itself will be made out of "Kraft Paper". It looks very similar to the cardboard tubes you find after finishing a paper towel role. We will be making very firm Kraft paper roles by wrapping them over pvc pipes and gluing strips of Kraft paper over it and layering it. Andrew demonstrated how to do it previously, and we also referred to this website. http://www.instructables.com/id/Make-your-own-Kraft-Paper-Tubes/?ALLSTEPS
Materials:
Directions: 1. CUT STRIPS
 2. WRAP FIRST LAYER
 3. WRAP ADDITIONAL LAYERS
 4. LEAVE TO DRY.
5. CUT OFF THE "POPE HAT"
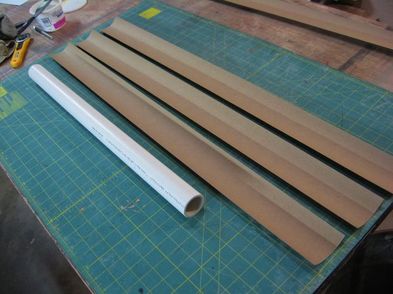
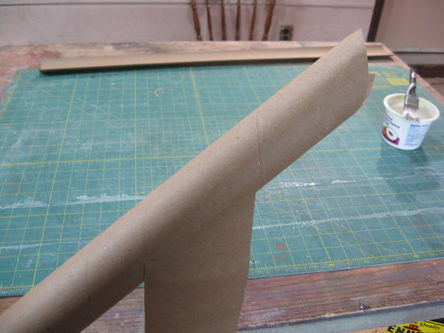
____________________________________________________________________________________________________ What Happened? - A Rocket Body Story We first claimed a pvc pipe which was 1 1/2 inches in circumference. We chose this size because the motor circumference was 1 1/4. It was very difficult cutting the kraft paper. Sammie banned me from cutting because I moved the ruler too much. It took a long while until I was able to cut since there were so many other groups trying to cut as well. It took about 30 minutes until we were allowed to cut. My group worked together to cut by having Isabel and I holding the ruler (until I was banned), and Sammie using the X-acto knife to cut. Israel took my place for holding the ruler and we finally got our four strips. It took several tries and we had to check over and over again if the ends of the paper was aligned. But finally we got it! We continued on and grabbed the pvc pipe that we received from Brian. We picked our best and very straight strip and began to tape the end of it to the pipe. We started wrapping the first one and Braden assisted us. The first strip was very straightforward, we just wrapped it without leaving space. But then as we got to the second strip, it became really difficult. We slathered the glue onto the pole and began to wrap our second strip in the opposite direction. We asked for help and Braden helped us wrap it. He began to overlap it, saying that it'd be alright. So we just let it happen. We started to overlap the other strips and next thing we knew, our rocket was a soggy, rippled, crinkly, mess. We shouldn't have overlapped, the inside of our rocket body was not consistent in diameter. We still let it dry overnight. The next morning, it was just a shriveled up piece of cardboard. We decided to scrap it I wasn't firm and it wasn't good. So we tried again, cutting more pieces of 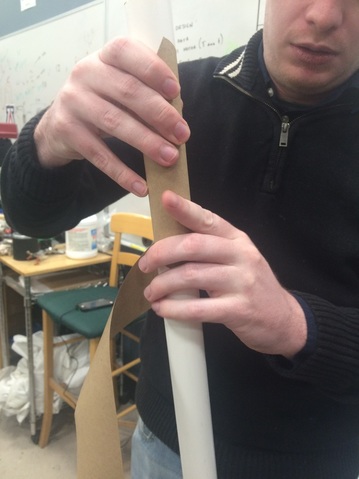 The next morning, it was just a shriveled up piece of cardboard. We decided to scrap it I wasn't firm and it wasn't good. So we tried again, cutting more pieces of cardboard paper. But the same thing happened again with our second try. We overlapped and it just wouldn't match up perfectly. Frustrated, we asked Andrew for help. And he actually showed us how to do it, we handed him new strips, and next thing we knew we had our perfect straight cardboard tube. He used the "indian burn" method and made the tube right before our eyes. Thank you to Andrew and Braden! 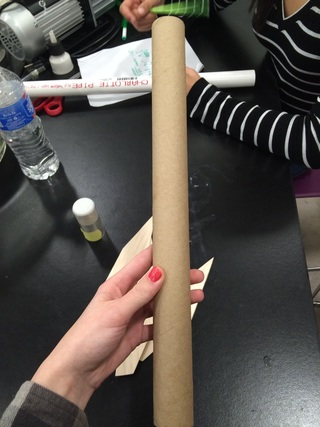 ____________________________________________________________________________________________________ FINAL PRODUCT: Height: 13 inches Circumference: 1/34 inches Thoughts: It was honestly very difficult building our body. But I was really glad to be able to experience something like that, now I know how to make a rocket body! It was very interesting and frustrating. We know now to do these things
I feel that the outcome of the tube was very good. It seemed really sturdy the next morning, and it was the perfect tube for our rocket. I was satisfied with what we did. |
AuthorWrite something about yourself. No need to be fancy, just an overview. Archives
December 2015
Categories |
 RSS Feed
